Oats Affair: How to make tasty oats meal every day?

Oats, my favourite breakfast food. Ironically now, everything with oats – I will love it!

I was often told about how oats were boring, plain and tasteless food. But I bet to differ that! Oats is one of the most versatile food in the world. From soften overnight oats, oat milk, oat cookies, oat loaf, granola, oat smoothie bowl, baked oat cake and the list goes on! I will be sharing some of my favourite recipes and show how to make tasty oats breakfast everyday!

11021093_10152810764882746_1920500005192982319_n

Eating well doesn’t mean tasteless food, that is my philosophy. Thinking back, I wonder when I started enjoying oats so much. I guess it was the time when overnight oats are trending a few years back, pretty jars and oats photos are everywhere on the Internet. Being a recipe hunter – I sourced for many healthy, interesting and ‘look-yummy-kind’ of oats breakfast recipes and immediately, oats became my staple food for breakfast. A healthy and hearty breakfast within minutes, why not?

1. Overnight Oats

For overnight oats, I start with the 3 most basic ingredients;

  1. Rolled Oat Flakes
  2. Greek Yoghurt
  3. Unsweetened Soy Milk (or any milk of your choice)

First, place oat flakes in a glass container and pour in milk till the brim that covers. Then, mix in desired amount of yoghurt to thicken up texture – it depends on the amount of oat flakes used. Leave them in the fridge overnight or at least 4 hours to soften oats. That’s it! Before serving them, do add in your favourite toppings. I like adding chia seeds, flax seeds, coconut flakes, cocoa nibs, nuts, nut butters and fruits! Banana, blueberries, strawberries and kiwis are fruits most commonly used in my recipes. Depending on availability, it is wise to switch around fruits that are in season by doing so you will only get the freshest and they probably cost lesser.

10615574_10152810880117746_5676650958699878614_nAlmond Butter, Blackberries, Cocao Nibs and Mango

10407497_10152660419237746_8196944951805400051_nBlueberries, Strawberries and Peanut Butter

996119_10152810880227746_5345600510246850903_n

Blueberries, Coconut flakes, Chia Seeds and Strawberries

The choices of ingredients used plays a huge role for a good breakfast. I use greek yoghurt and unsweetened soy milk for it’s high protein and low-fat content as compared to sweetened flavoured yoghurt/milk which contain added sugar. By doing so, I can reduce my sugar and calorie intake yet still enjoy the perfect oats breakfast with my favourite fruits and nuts! Do also note that overnight oats should be consumed within 3 days of making as to maintain freshness of oats, yoghurt and milk.

Read more on : Greek Yoghurt vs. Regular Yoghurt

This breakfast choice save me much time before the mad morning rush everyday. Digging in to a cold hearty breakfast packed with fiber, vitamins, proteins and nutrients which does not require cooking at all. How amazing is that! Also, have fun playing around with portion sizes as it took me a while on varying the amount of oats, milk and yoghurt to finally getting my favourite combination. Ahh…..My perfect post-workout fuel ♡

What else can you do with Oats?

2. Yoghurt Fruit Parfait – Layers and more layers! That’s how a parfait looks like. Using almost similar ingredients in the overnight oats recipe substracting the milk, parfait contain more fruits than oats! Good to go as a mid-afternoon snack, simply layer your favourite fruits, toppings, yoghurt, honey and oat flakes. Repeat steps. That’s it!

10628353_10152615170447746_45676292046594891_n

3. Oat Milk Drink oats! Blending my own Oat Milk bring ease as it is free from added additives or preservatives. Naturally sweet and energy boosting, oat milk seems to be a great post-workout drink replenishing carbohydrates, minerals and protein lost during exercise. Moreover, it’s so simple to do!

(Recipe can be found on my previous post: Homemade Oat Milk)

10614324_10152438483532746_7140086137043875159_n4. Oat Smoothie Bowl – My “throw-in-everything and blend” breakfast! Days when I am too lazy to chew my food, oat smoothie bowl is my best friend. Place all the ingredients (usually fruits, milk, vegetables and oats) into the blender and blend it high for 30 to 60 seconds until smooth and top it with your choice of toppings.

(Recipes can be found on my previous post: Kale Smoothie Oat Bowl and Pumpkin and Banana Smoothie Oat Bowl)

10686978_10152588619517746_6574586993821182345_n

Pumpkin and Banana Oat Bowl topped with Banana Coins, Chia seeds and Dried Fruits

Green

Kale Smoothie Oat Bowl topped with Coconut Flakes and Chia Seeds

10676124_10152713938727746_7665932865345643370_nHoney Papaya & Banana Smoothie Oat Bowl with Persimmon, Coconut Flakes, Flax Seeds, Cocoa Nibs and Almonds

10423689_10152689503692746_5036815142955920960_nBlack Sesame Steel Cut Oatmeal with Cocoa Nibs and Raw Almonds

5. Cooked Oatmeal with Egg – When mum is not home and my fridge went into a famine. Protein loading is not impossible and all you need is oat flakes and an egg! Boil oat flakes for about 8 – 10 minutes and crack an egg and stir together. Optional, add extra honey or nut butter to it for a more flavourful taste! Simplicity is sometimes a good thing afterall as this is one of the most cost-friendly recipe around!

11037462_10152810879622746_2499406589110708075_n

6. Healthy Oatmeal Banana Bread – My favourite homemade bread in the world! With zero sugar and only natural ingredients, it’s absolutely healthy and filling! Homemade bread are chunkier comparing to conventional packaged bread which is not filling and contain many food colourings, preservatives and other addictives that I can’t even pronouce. Moreover, it is not that difficult afterall. Try it!

(Recipe can be found on: Stayfitandtravel: Healthy Oatmeal Banana Bread)

541597_10152653460922746_5373167736160628021_n 1510348_10152713940117746_306858562647527585_n

Oatmeal Banana Bread with Almond and Cashew Butter with Banana and Cocoa Nibs

7. Baked Oats with Banana and Raisins – With it’s name, this is basically oats baked with fruits, dried fruits and egg! Baked oats tastes like oat pie, which is crispy on the outside, moist and chewy on the inside. Best served with honey or pair it with a cup of coffee during tea break!

(Recipe can be found on: Stayfitandtravel: Homemade Banana and Cranberry Baked Oats)10898121_10152698926042746_3721092541210432994_n

Oatmeals are never boring. All it takes is a little effort and preparation for a wholesome healthy breakfast. Anyhow better than a greasy buttery bun at the confectionary or the fried bee-hoon from the coffeshop. Studies shown that eating oats keeps you full longer as soluble fiber in oatmeal absorbs a considerable amount of water which significantly slows down your digestive process. Moreover, oatmeal contains a wide array of vitamins, minerals and antioxidants and is a good source of protein, complex carbohydrates and iron.

Treat your body better by starting your day with this nutritional superstar! Enjoy! ♥

SKIPPY® Natural Peanut Butter Spread + Giveaway

SPONSORED POST

11044501_10152824514417746_5411133498191220707_n

Hoola! I am so excited to share with you a whole new series of SKIPPY® Natural Peanut Butter Spread! I guess everyone at all ages loves peanut butter! Who doesn’t? Peanut Butter must be the best thing on Earth! Having SKIPPY® new range of products right in front of me simply spells out joy and happiness cause there will be more funky recipes for me to explore and include them in it! SKIPPY® spreads are so versatile in every recipe and delicious at the same time ♡

10666104_726124130758878_7173619967492305708_n

Made with only the finest peanuts, the SKIPPY® Natural Peanut Butter Spread is free of preservatives and artificial flavors and colors, and uses palm oil in its natural state, without sacrificing the taste. In addition, its no-stir technology prevents oil separation making it easy and smooth to spread over everything and still has the classic peanutty taste of SKIPPY®. Providing seven grams of protein in each serving to fuel your day!

The SKIPPY® Natural peanut butter spread will be available in six different flavors. They are:

  • SKIPPY® Natural Creamy Peanut Butter Spread
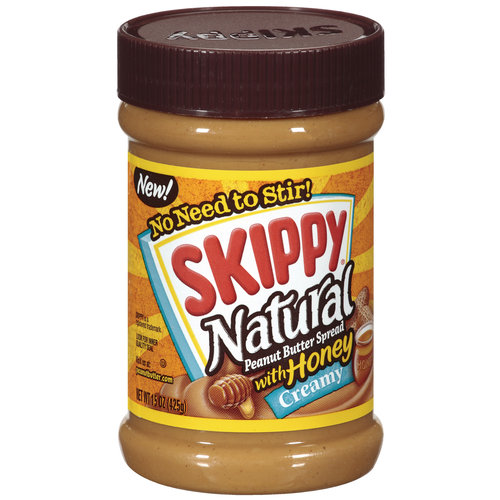
  • SKIPPY® Natural Creamy Peanut Butter Spread with Honey
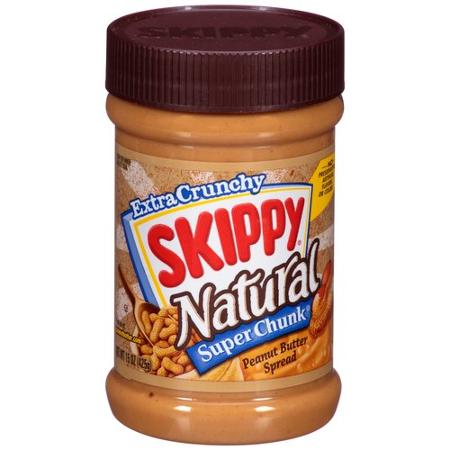
  • SKIPPY® Natural Super Chunky Peanut Butter Spread
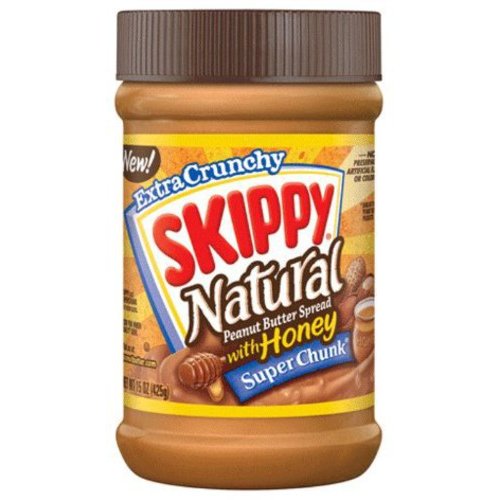
  • SKIPPY® Natural Super Chunk Peanut Butter Spread with Honey
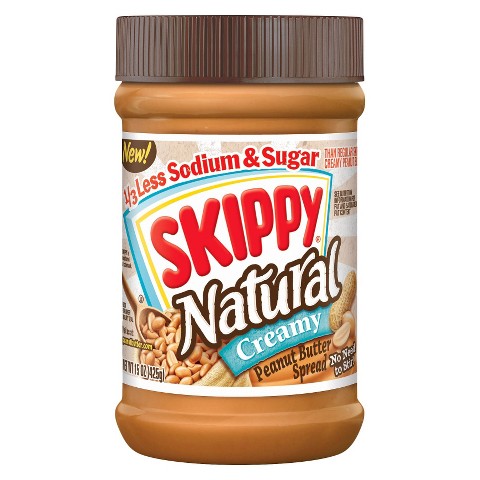
  • SKIPPY® Natural 1/3 Less Sodium and Sugar Peanut Butter Spread
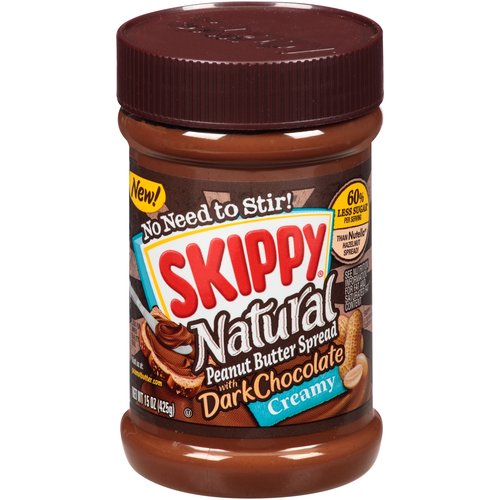
  • SKIPPY® Natural Peanut Butter Spread with Dark Chocolate

SKIPPY® Natural Creamy Peanut Butter Spread

creamy

The Classic Creamy Spread: Made from only the freshest peanuts, this spread is smooth and creamy yet not too sweet. Perfect for daily spread over toast and as a topping on my overnight oats! I love this classic spread as it is most versatile, it can be mixed with almost everything especially useful for baking and cooking. I did pancake sauce (recipe below) with it too!

SKIPPY® Natural Creamy Peanut Butter Spread with Honey

Honey CreamyCreamy + Honey Spread: What do you get when sweet meets satisfying? SKIPPY® Natural Creamy Peanut Butter Spread with Honey is a match made in peanut-butter-honey-heaven. Yummy! The texture is nice, creamy and thick with a tinge of sweet honey taste! After all, what’s sweeter than the taste of real honey? The perfect option for kids!

SKIPPY® Natural Super Chunk Peanut Butter Spread

Super Chunk

Extra Crunchy Super Chunk Spread: My second favourite pick of all! I love peanut butter blended with real peanut pieces in it. Allowing the taste bud on a texture ride, they give a nice crunch in every bite plus the overflowing nutty taste. How could anyone resist it?

SKIPPY® Natural Super Chunk Peanut Butter Spread with Honey

0004800115994_500X500

Crunchy + Honey Spread: Savor the sweet crunch of SKIPPY® Natural SUPER CHUNK® Peanut Butter Spread with Honey. It’s a satisfying spoonful with real peanut pieces and real honey added to the mix. Spread the great taste naturally with this crunchy and sweetly delicious peanut butter with real honey!

SKIPPY® Natural 1/3 Less Sodium and Sugar Peanut Butter Spread

Less sodium

1/3 Less Sodium and Sugar: This is the best pick for me! I am enjoying the creamy peanut butter goodness with 1/3 lesser of sodium and sugar. This lighter option has a milder taste yet nice and subtle. Retaining it’s creamy texture, my favourite would definitely be this!

SKIPPY® Natural Peanut Butter Spread with Dark Chocolate

0004800121125_500X500

Chocoholics and peanut butter fans unite for a crazy good combination of peanut butter with dark chocolate that you’ll want to spread on whatever you can eat! I made Pancake Sauce by using SKIPPY® Natural Peanut Butter Spread with Dark Chocolate and served it with Banana Buckwheat Pancakes! Too good and delicious! It was not too sweet to my liking and tasted like the perfect combination of Dark Chocolate and Peanut blend.

Recipe

Pancake Sauce (serve 3 or more)

  • One teaspoon of coconut oil
  • One tablespoon of water
  • 2 tablespoons of SKIPPY® Natural Peanut Butter Spread with Dark Chocolate
  • 1 tablespoon of SKIPPY® Natural Creamy Peanut Butter Spread

Heat and stir them together, serve them with your favourite pancakes recipe!

11042654_10152824536427746_2953134694953458912_n

skippy-new-natural-range

PHOTO CREDITS: SKIPPYSG FACEBOOK

SKIPPY® Natural products have a retail price of approximately $6.00 per 425g jar and available at leading local supermarkets nationwide including Cold Storage, Isetan, Giant, Jasons, Mustafa, Meidi-Ya and Sheng Shiong.

Get more information on SKIPPY® Facebook Page 


So here is the fun part!

Here’s your chance to try all 6 flavours from ‪#‎SkippySG‬! To take part in this giveaway;

1. Like SKIPPY® Peanut Butter Singapore Facebook page 

2. Share this blog post on your Facebook and tag three friends!

3. Leave a comment below with your Facebook URL and email address.

2 winners will be picked randomly and giveaway will end on 31 March, Tuesday at 12am. Good luck everyone!

Recipe: Kale Smoothie Oat Bowl

Adding greens to my meals have never been so simple! Currently, I am increasing my greens intake by adding them in for breakfast – one of the easiest ways to kick-start a healthy day. Green juice, green smoothie and green oat bowl makes a perfect breakfast choice for me. I picked kale as my choice of green! Why?!

Kale is also known as “the queen of greens” and has a long list of benefits under its name. This nutritional powerhouse is low in calorie, high in fiber and has zero fat, at the same time delicious! Kale plays an awesome role by aiding in digestion and elimination with its great fiber content. Nutrient-dense, kale contains fiber and sulfur – both great for detoxifying and keeping our liver healthy. Moreover, you can mix and match kale with any kind of frozen fruits and transform distinctly different flavor profiles possible with it. How yummy!

For more kale benefits: Read here.

1. Kale Smoothie Oat Bowl

10942442_10152726705132746_4302752800492472758_n

INGREDIENTS

  • 1 cup of Kale (4-5 leaves)
  • 1 Frozen Banana
  • 1/2 cup of Frozen Coconut flesh
  • 1/2 cup of Rolled Oats
  • 1/2 cup of Soy Milk (Unsweetened) / Any milk of your choice
  • A handful of chia seeds
  • Honey (Optional)

TOPPINGS

  • Strawberries Slices
  • Banana Slices
  • Blueberries

DIRECTIONS:

Place all the ingredients into the blender and blend it high for 30 to 60 seconds until smooth. Pour kale oat smoothie mix into a bowl and top it with your choice of toppings. My perfect breakfast choice anytime!

2. Kale Smoothie Drink

10922543_10152713939627746_338584721218959769_n

INGREDIENTS

  • 1 cup of Kale (4-5 leaves)
  • 1 Frozen Banana
  • 1/2 cup of Frozen Coconut flesh
  • 1 cup of Soy Milk (Unsweetened) / Can replace water for a lighter taste

DIRECTIONS:

Place all the ingredients into the blender and blend it high for 30 seconds until smooth and serve.


For breakfast, I prefer eating from a bowl as it feels more satisfying than drinking it in a glass. After 7-8 hours of sleep (hibernation), the body requires more energy to kick-start the day. Therefore, by adding in oats into our usual smoothie combination – makes it a perfect breakfast choice. As for the smoothie drink, I consume it during “snack-time” for an energy boost or as my dinner replacement if I am not feeling too hungry at night.

While smoothie bowls are trending, it is also important to take note of the calories consumed. By adding too much nut butters, sweetened yoghurt, raw nuts or granola – you can easily end up with several hundred more calories than you might suspect. Therefore, do keep portions in check and smoothie bowl definitely makes a nutritious and healthy meal.

I hope you enjoy these recipes as much as I do! ♡

Recipe: Homemade Oat Milk

10599215_10152433828152746_8638448339013525441_nOn the table this morning, will be my very own home-made Oat Milk! I really enjoy Oat Milk as compared to conventional cow’s milk and the benefits list goes on. It’s have many healing properties and are best known for their high protein and packed with minerals and vitamins, high in natural fiber, lactose-free, low fat and calcium rich! Oats can enhance the immune system, prevent cardiovascular diseases, maintain healthy cholesterol and blood sugar levels, provide strength and energy from natural plant proteins and sugars, and improve the health of your skin and hair!

Oats are easily available everywhere in Singapore and considered an extremely health-conscious choice. Therefore, switching to oat milk is a preferable option if you are looking to lose weight. Moreover, it’s SIMPLE to do-it-yourself! And you don’t have to worry about additional additives being added in to your own DIY milk, as compared to other commercial brands. Also by customizing, you can fine tune your Oat Milk to your own liking! Simply because you will have complete control over the texture of milk and flavor.

Fresh, affordable and delicious!

Preparation time:  Less than 5 minutes (excluding soaking the oats). How simple is that! ♡

Oat Milk

INGREDIENTS:

  • 1 cup rolled oats ( I used Organic Anzen Regular Oats)
  • 3 cups filtered water
  • 1 tbsp pure honey
  • 1 tsp pure vanilla extract
  • Fine grain sea salt (Sprinkle sparingly for taste)
  • 1/4 tsp ground cinnamon powder *Optional*
  • 1 tablespoon light-tasting oil (sunflower, almond or walnut oil) *Optional*

EQUIPMENT:

  1. Blender
  2. Nut milk bag OR a Strainer with fine sieve

10614324_10152438483532746_7140086137043875159_nJust 9 simple steps within minutes and you will get your very own Oat Milk!

Step 1: Rinse and drain 1 cup of rolled oats. Place oats into a bowl and cover with water. Soak for around 20 minutes or longer (even overnight) if desired. Not only does soaking help soften the oats, but it also removes extra starch and makes them easier to digest.

Step 2: After soaking, rinse and drain the oats very well. This step is very crucial as removing oat slime from soaked oats determines the texture of the after-product.

Step 3: Scoop all the oats into your blender and add 3 cups water. You may customized it by adding more or lesser water, depending on your preference.

Step 4: Turn the blender on a low speed and increase the speed gradually.

Step 5: Blend it for about 15 – 20 seconds; do not blend till oats are pulverized.

Step 6: Sieve the blended oat milk and use a spoon to gently push down on the oat pulp so the milk flows through.

Step 7: Scoop the oat pulp and set aside. (Do not throw the oat pulp as you may use it for smoothies or facial masks!)

Step 8: Repeat sieving the milk if necessary.

Step 9: Almost there! You may add in your mix-ins after the final sieving and blend it for 3 seconds.

10399980_10152438483672746_1042408804638777990_nHow it taste like?

The flavour of this oat milk tastes like oats and I love it! The texture of the milk tastes exactly like the one bought in store! I really enjoy customizing the taste to suit my own taste-bud. The texture, the sweetness and the additional mix-in! You may even add in raw chocolate nibs to make a Chocolate Oat Milk! This should last in the fridge in a sealed container for 4-5 days. You may use it in fruits smoothies, cereal, baking, or drink it straight from the jar. For me, I love dunking my wholemeal bread in it and have it for breakfast! Simple and on-the-go!

Note: Homemade milk does separate, as it is free of emulsifiers and thickeners, so be sure to shake or stir your milk before drinking it.

Enjoy! ♡

Recipe: Taiwanese Taro Balls

Taiwanese Taro Balls Recipe

jiufen-food

I love TARO balls! Fell deeply in love with taro and sweet potato balls during my first trip to九份, Taiwan. Renowned for their famous QQ balls! In Taiwan, they are basically served with red bean, cream milk, grass jelly and black pearls!

I decided doing some home-made taro balls as it is not cheap eating them outside with miser serving. I would love to see a mountain-ful of chewy taro balls. They are also known as yuyuan (芋圓) which is made with taro, or diguayuan (地瓜圓 or 蕃薯圓) which is sweet potato.

Ingredients

Taro Balls

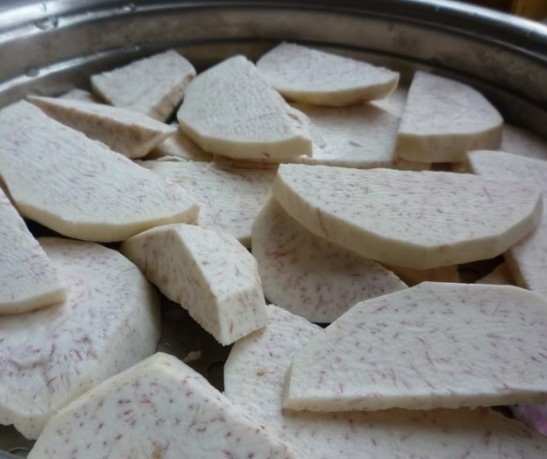
  • 1 taro about 1.5 pound
  • 1.5 cups sweet potato flour
  • 2 tablespoons sugar to taste

Directions:

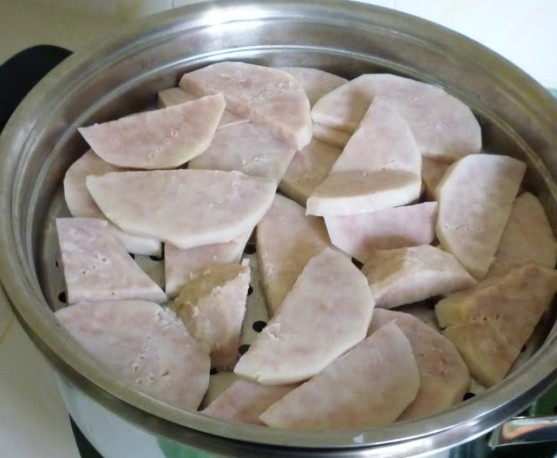
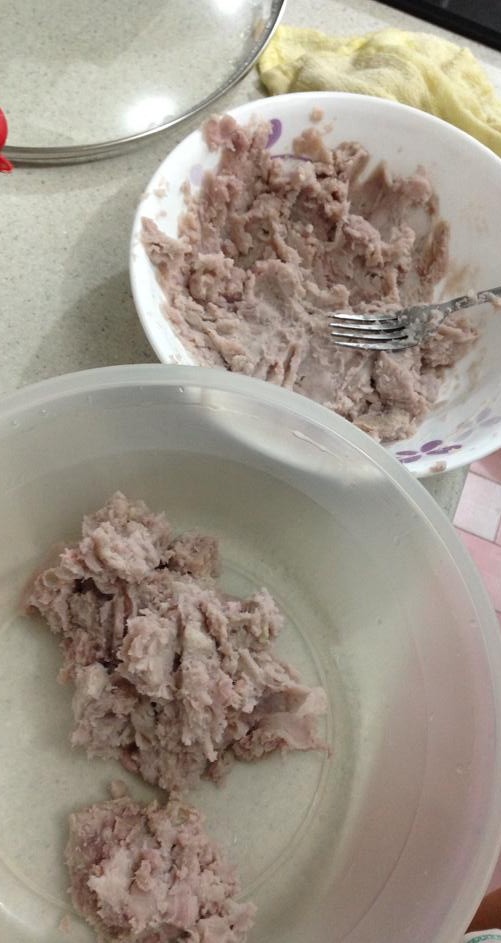
  1. Slice and cut taros into pieces and steam till soft (about 15 – 20 minutes).
  2. Test the steamed taro by using a fork if the taro breaks easily, proceed to next step.

P1080040 P1080042

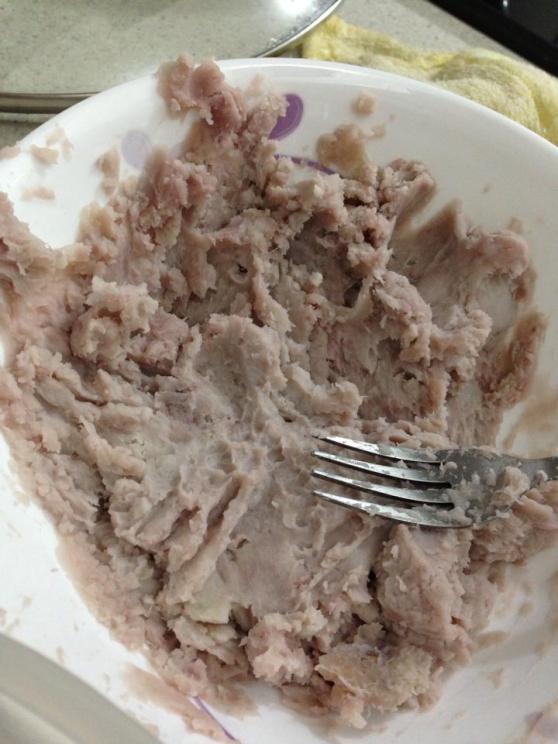
3. Smashed taro and add in sugar. Do this while the yam is still hot for ease-sake; it’ll be easier to mash and mix with sugar while it’s warm.

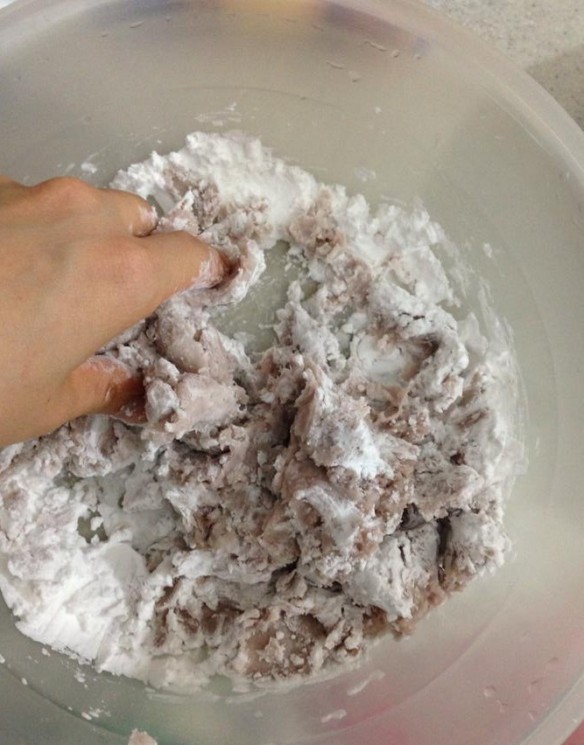
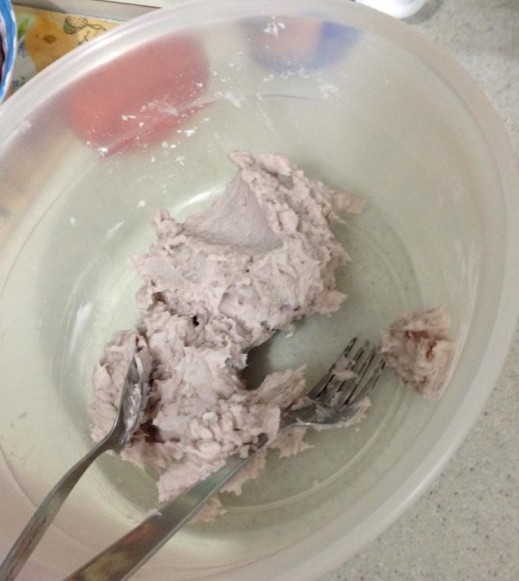
4. Add sweet potato flour to the mix and (optionally) a bit of water. Dough should be mashed up evenly, feeling elastic and smooth. If the taro mixture seem dry, add more water (1 spoonful), otherwise if it is too wet add in more flour.

10273656_10152175124202746_1580698100135801744_n10347506_10152175124332746_2325370436723877030_n10257428_10152175124257746_2176410769905137233_n

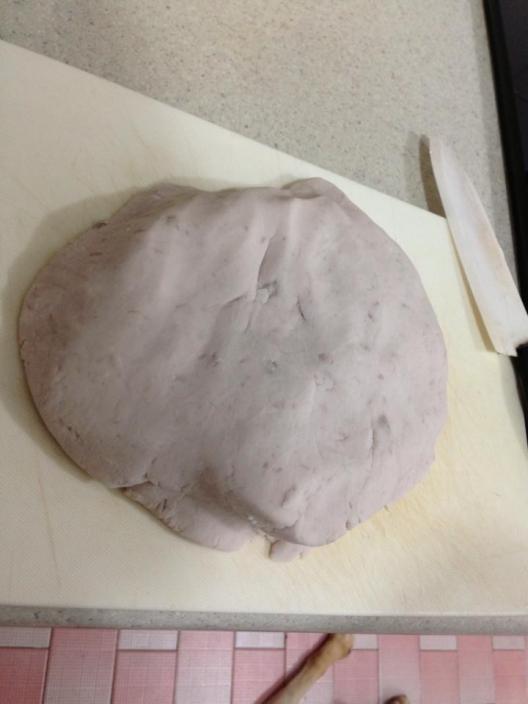
5. Continue mixing all the flour with the taro mixture and continue kneading it until mixture becomes dough-like.

10367747_10152175122357746_1454605547515638911_n10369728_10152175123412746_5646992376561436606_n

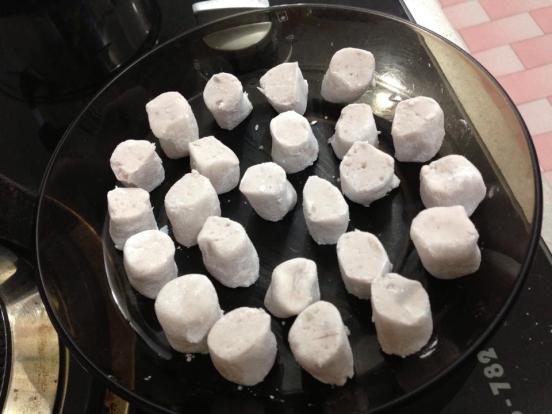
6. After which, you may roll up and chop taro mixture into cubes (like what I did) or roll it up like an ah balling! The texture, regardless of shapes will taste the same if taro mixture is properly mixed and kneaded.

10298866_10152175122012746_7445355262039005333_n

7. You may toss taro balls in cornstarch, before cooking to prevent them from sticking together. Do place them to a container to store if you are not cooking them right away, as to prolong the freshness of the taro balls.

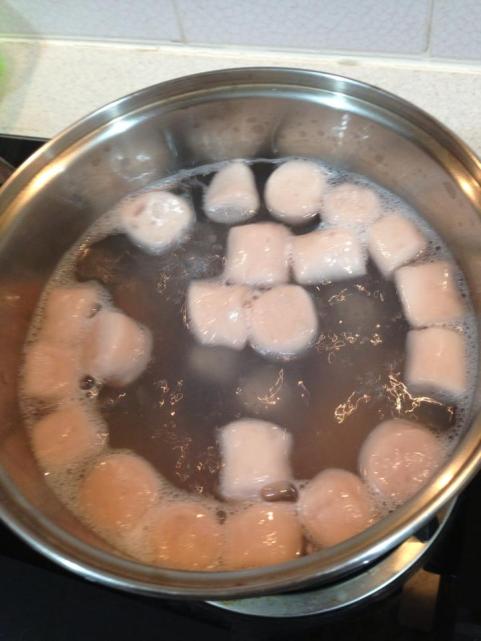
8. Cook the taro balls in a pot of simmering water for several minutes until they float. (If you are going to cook the frozen ones, there is no need to defrost them)

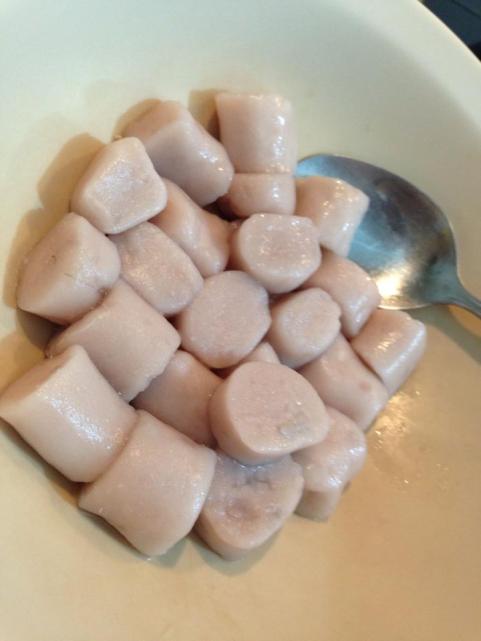
9. Toss the cooked balls into a bowl of iced water. By doing this, taro balls will be cooled down quickly and taste more chewy = QQ texture.1506990_10152175121792746_2863391857271064140_n

1609943_10152175121822746_393893256129223644_n10251985_10152175121672746_8678865561549243041_n

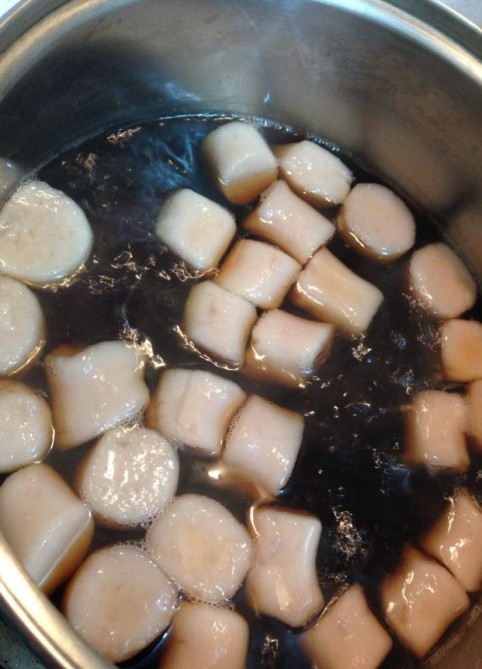
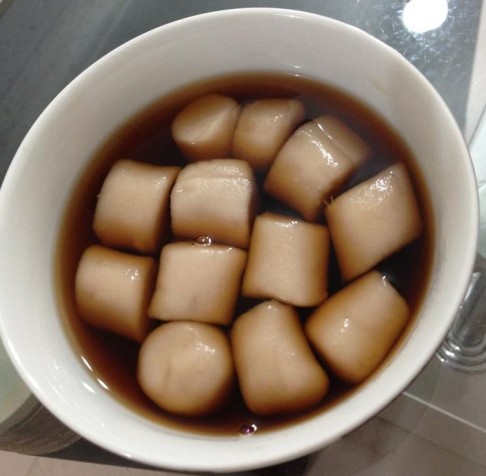
In this case, I cooked them with brown sugar (after Step 1-9)! I prefer cooking uncooked taro balls in water and cooked them again with brown sugar. In this case, the taro balls preserve it’s chewiness and the base of the dessert will not have additional flour taste.

10311365_10152175121502746_5954180152704344283_nHere you go! Yummy tummy taro balls! Best with grass jelly and coconut milk! This recipe is simple to follow and hope you all enjoy it as much as I did! 🙂

My Weekends

“Happiness is when everyone enjoy your food & bakes!”

tofu1

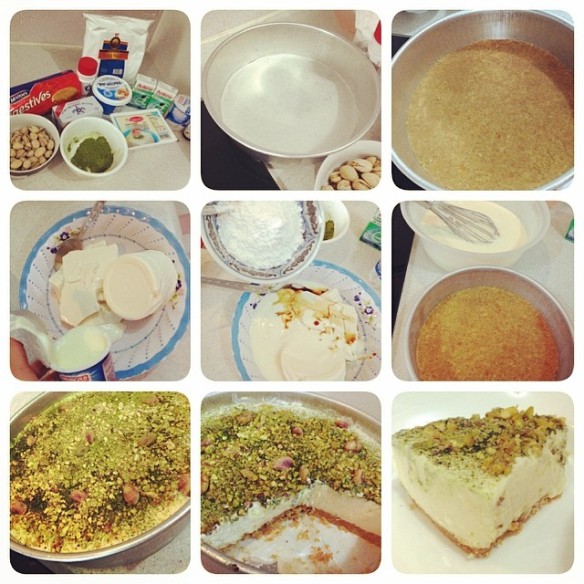
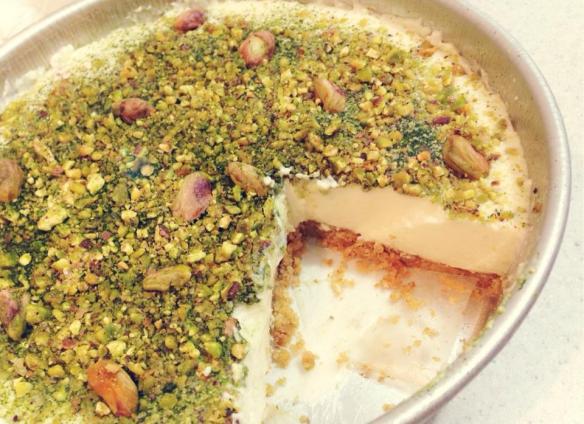
You won’t need an oven or any baking skills for this no-bake cheesecake! Really glad to have done this Matcha Pistachio Tofu Cheesecake recipe! Everyone loves the texture of the cake and the taste! The whole family enjoys it, even my extended relatives. Light, smooth and yummy! Feeling proud really! This is the first time I did it.

Ingredients (8 slices):

Tofu Cheesecake

  • 300g Unicurd silken tofu
  • 250g Philadelphia Cream cheese
  • 15g gelatin powder
  • 50ml water
  • 200g icing sugar
  • 200g plain yoghurt
  • 50ml of Anlene Concentrate milk
  • 1 teaspoon vanilla essence

Biscuit Base

  • 200g Mcvities digestive biscuits
  • 80g melted butter

Matcha Pistachio Topping

  • 20g matcha powder
  • 80g crushed salted pistachios

Originated Recipe from: Shiberty.com 

I did certain changes to the original recipe and opted in for a healthier choice! Cause being healthy is in me! 🙂 And I do foresee myself doing this more often and serving to my friends too! I enjoy seeing people eating & enjoying it! Heh.

tofu2

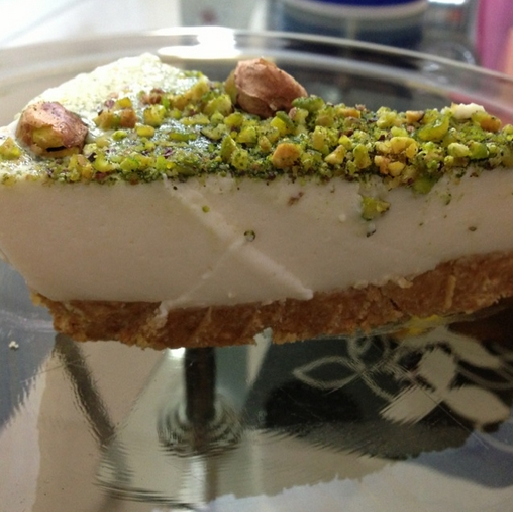
Tofu cheesecake is especially light on the taste buds and healthy as compared to conventional cheesecakes! Cause, personally I am not a sweet tooth person and I don’t fancy cakes. This time round, I’m in love! Light texture and extreme load of calcium in it! I enjoy it especially with my McVities biscuits!

Directions:

  1. Line a removable base baking pan (8″ round size) with baking paper.
  2. Crush the digestive biscuits into fine crumbs and combine with melted butter.
  3. Press tightly into cake pan and leave baking pan in the freezer until required later.
  4. Dissolve and stir gelatin powder in warm water. Set aside for use later.
  5. Empty the rest of tofu cheesecake filling ingredients into an electrix mixer, and mix until well combined, around 1 minute. Add the dissolved gelatin at the end, stirring thoroughly.
  6. Remove baking pan from the freezer. Pour your tofu cheesecake mixture into the pan.
  7. Sprinkle the top generously with matcha powder and pistachios.
  8. Chill in the fridge for at least 4 hours or until firm to the touch, when it doesn’t wobble too much when you shake the pan.

tofu3

I think this is one of my favourite cake ever! Mixing it with matcha & pistachios are really optional. You can mix it with passion fruit juice too! It’s really up to you.

tofu4

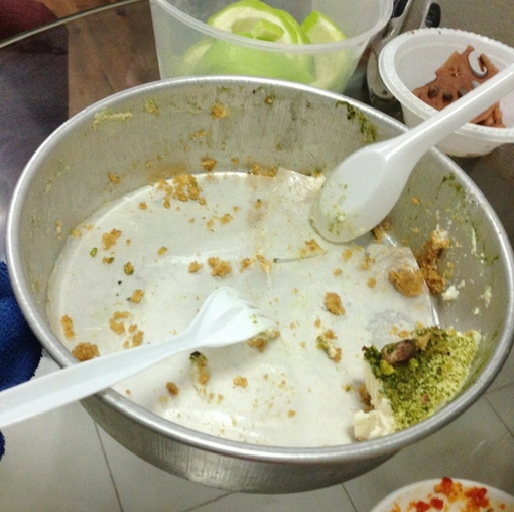
The evidence of clearance!! Haha! I just made it yesterday, so fast! Purposely left a small bit to show that it’s my cake!

Happy and satisfied that people around do appreciate and love what I do for them. Probably, this is the best way for me to show how much I love them.

tofu5

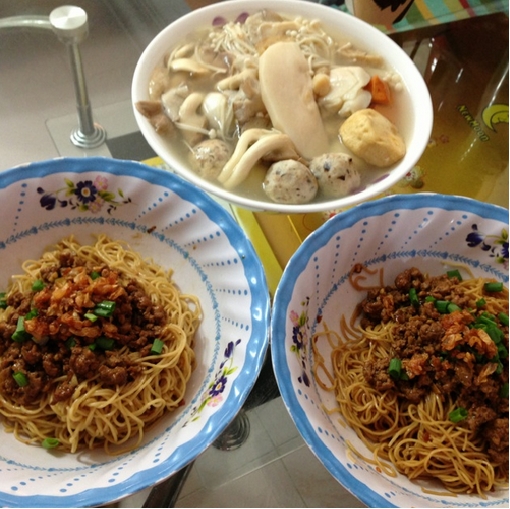
Other than baking, I enjoy cooking too! Made dinner for the family & Wayne. Trying out the new Hong Kong noodles with a fusion of Malaysian minced pork style! I think Wayne is a lucky man! Thou he is a better cook than me, I tend to spent more time on cooking than him.

I even told him I wanted to be a housewife! Heh! Just saying.

tofu6

Even today’s breakfast. Healthy organic milk, button mushrooms, cheese and eggs!

They belong to the weekends, aren’t they? In house brunch isn’t a bad idea too, save money and can add a lot more ingredients whenever I want! Yay! Refusing to spent my money on cafes, cause it is tad too much of expenses!